Archive | Free Tutorials RSS feed for this section

{ FREE Tutorial } Beaded Zipper Pull

15 Apr

Collect a few beads or buttons

For the zipper pull on this little pouch I used the old bead buttons from the sweater I  made the pouch out of, I love to upcycle and recycle all I can!

Next get some heavy thread.  I used a waxed thread

Thread the waxed thread through the zipper end and cut a nice size thread to work with

Tie a knot.  Do this twice

using a needle add a bead

tie a knot again

One bead on!

continue to add beads and knot until you are satisfied with how you zipper pull is taking shape.

Once you reach the end secure with two knots and trim the thread

Ta Da!  You’re done . . . It’s that easy

Subscribe on the right, and you will be emailed when I add great new tutorials!


{ My Projects } Tooth Fairy Pillow

3 Apr

So here is the Tooth Fairy Pillow I made in Speedy Gonzales fashion one late night when my little lady Kyndall lost her first tooth.  You can read about that escapade here!

I had to think quick if I wanted to get this crazy Mom project done . . . but then all my projects have to be fairly quick anyways being a Mom of 5  or they just don’t get done!

I remembered over at mmmcrafts,  that talented gal Larissa had a really cute pattern for a tooth fairy pillow.  Click here to visit her post for the pattern.

Of course, being as late as it was, and being my thrifty self, I dug into my stash to complete this quick project.

If I were to make another one ( I see four more in the future, as all  the girls were swooning over this one.  lol )  I would embroider some cute eyes or use googlie eyes and make a little skirt and maybe some ballerina shoes.  It would be fun to use organza for the wings.

As it was I just grabbed whatever color felt I had and made it work.  So this tooth fairy pillow ended up with green eyes and flowered paisley wings!  Not the cutest she could be, but hopefully she will inspire all you creative ladies none the less.  I just love how the mouth opens for a place for the tooth to hide!  So cute, Thanks Larissa

Send me a photo if you make one . . . I’d love to see {{ smile }}

{ Tips on Tuesday } Gathering

29 Mar

I don’t know about you, but I find it very annoying when I have to do a lot of gathering.

Pattern instructions often say to stitch two rows of a loose stitch and then pull the bobbin thread to make a nice bit of gathering.

You know me, I am always looking for a way to cut corners so I never stitch TWO rows of loose stitches and then inevitably as I’m gathering I break the thread . . . AAHH!

Here is a wonderful tip that was passed on to me and it works beautifully every time!!

Set your machine to a loose zig zag stitch and then zig zag over embroidery floss, or light cording, even a heavy thread would work.

Then the zig zag stitch will easily gather as you pull the heavy thread beneath.

Beautifully gathered with no broken stitches and even saved time because you only had to stitch once . . . I love it!

Try it and let me know what you think . . . I’d love to hear from you.

Be sure to check out the video I just added!

28 Mar

Hello Ladies!

I just added a video to the FREE tutorial on how to make a baby wrap.  In this video I give you a visual demonstration of what I have found to be the best way to put the baby wrap on and place baby inside the wrap.

Check it out and let me know what you think!

~Lia

Tips on Tuesday

12 Mar

As I was working on my latest tutorial I was thinking . . . of all the little things I do to cut corners, save money, save TIME!, keep me sane 😉 and make things work in this busy household of mine!  I decided to begin

So . . . Every Tuesday I will share a life altering (just kidding) tip that I have learned through trial and error, blood sweat and tears (I like to be dramatic it’s fitting for a house full of GIRLS!) It may be sewing, crafting, cleaning, organizing, cooking, baking or just plain surviving from day to day in this roller coaster life as a MOM . . . chaufer, referee, cheerleader, queen bee, money saver . . . oh my the list goes on!!!! I love every minuite of it even though I am often exhausted at bedtime.  🙂

Someone once told me of raising children . . .

The days are LONG, but the years are FAST!

I can tell you for sure this is true.  There is a lot to get done in a day, but these lovely ladies are growing FAST.  I try to treasure every moment ( and then there’s those other times; when we just pull the car over and cool off before we continue 😉 lol )

So~  Be sure to subscribe so you can get all my great

Every little bit helps! 🙂

~Lia

{ Free Tutorial } How to make a Baby Wrap

12 Mar

I just LOVE . LOVE . LOVE . my baby wrap!

Maybe I should say Little Lady loves it, but I love it for different reasons than she does!!

Why I love to wear my Little Lady in a baby wrap:

  1. She loves to snuggle in and feel secure as she did in the womb and almost instantly becomes calm
  2. When I am shopping or cleaning or cooking, wearing baby makes me hands free and baby is content
  3. Pulling the fabric over Little Lady to shield her from coughing and germs in public places makes me feel like she is protected and safe
  4. The other Little Ladies love to wear her in it too – what a help for me sometimes!
  5. Following my tutorial here you can custom make a baby wrap to YOUR unique style and make a statement!  I like that it is not only a life saver, but can be stylish too.

This tutorial has moved to a bigger and better home on the net!

Click this link to go to the baby wrap tutorial

{ Free Tutorial } How to sew a French Seam

11 Mar

In this Free Tutorial I am going to show you how to sew a french seam.

First of all . . . you may be wondering “what is a French Seam?”  A french seam is a seam that is completely encased, there are no raw edges on the right side of the garment or the wrong side.

If you did not own a serger, or overlock machine, a french seam would be one way to secure the edges of your garment when you sew.  French seams are also used in high end garment making that “pay attention” to details.

So here goes~

  • First of all you will sew the WRONG sides together.


Now, normally you always sew right sides together, but with a french seam the idea is to encase the raw edge so you begin by sewing wrong sides together a little shy of your seam allowance.

  • Next, turn the fabric so you have RIGHT sides together and PRESS

  • Now you will stitch at your seam allowance to completely encase the raw edge

notice my fabric is now to the edge of my presser foot

I am completely encasing the raw edge in this stitch

Here you can see the right side of my seam on the outside of the garment (far right) it just looks like any other seam.  The wrong side which would be the inside of my garment (far left) is a finished seam also with no raw edges exposed.

Have Fun!

~Lia

Sew a Monkey! Free Tutorial and Pattern

25 Feb

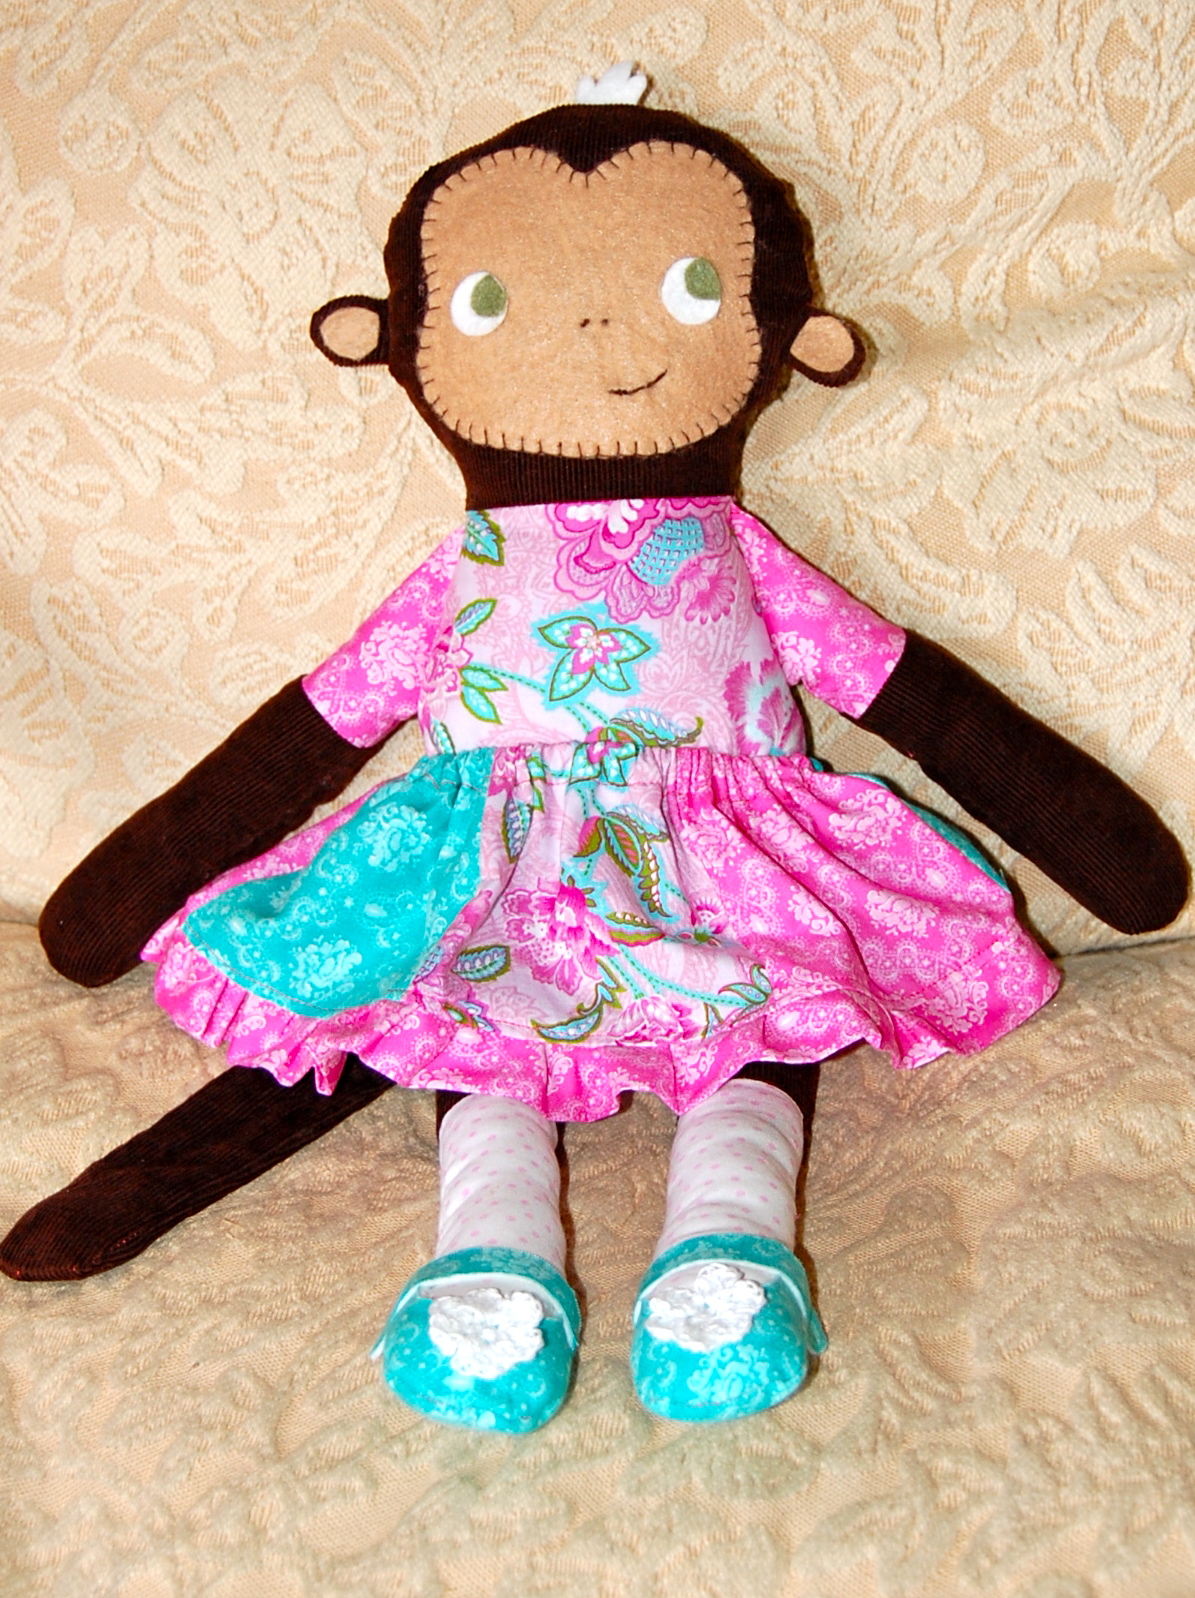
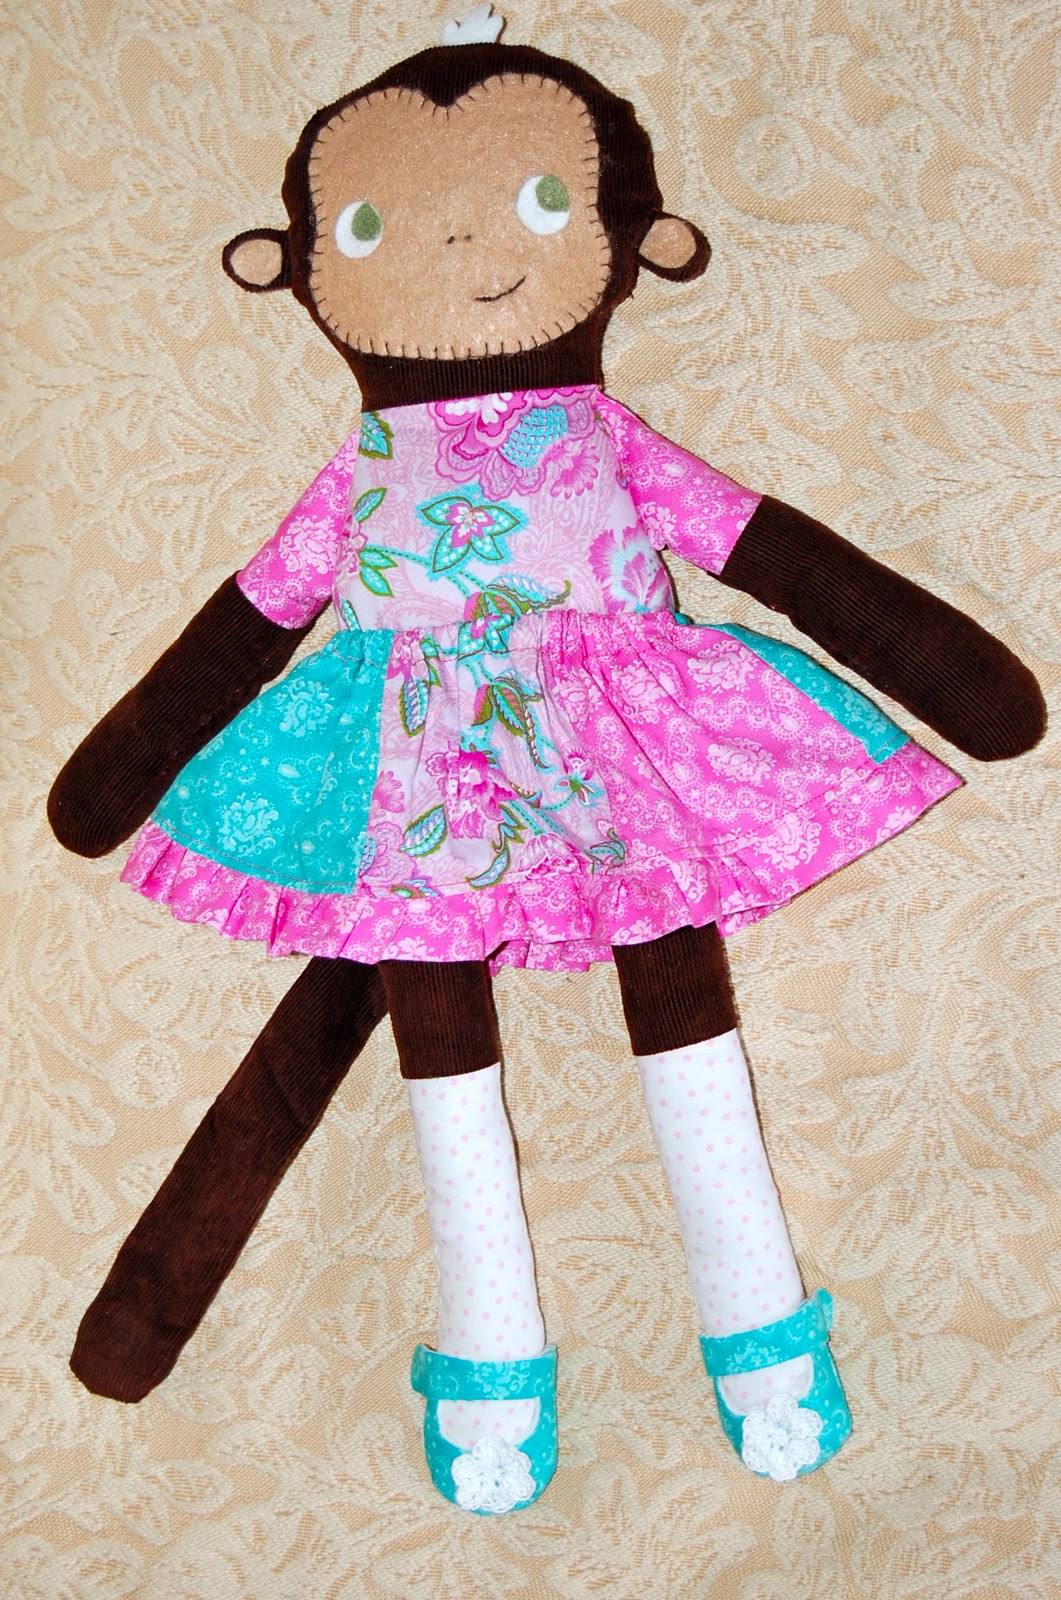
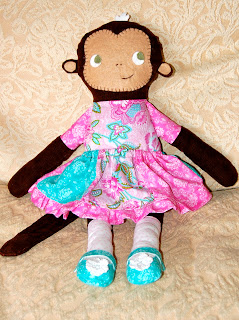
So I’ve had this darling monkey pattern for months and have wanted to make it but had never found the time . . . my little niece had her first birthday and it was the perfect opportunity to make one!  I am so pleased with how it turned out.  In fact it was really hard to put it in the mailbox especially when the girls were all swooning over it!

  • I found the free pattern over here at mmmcrafts

some corduroy fabric in my stash and a few coordinating prints in fun colors. Molly really came together nicely without too much trouble I would say a beginner could do this project.

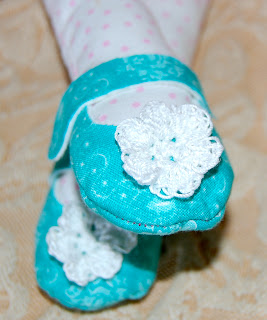
I made the shoes as I do when I make baby shoes with felt and fabric.  I will add a free tutorial for that  and link it here if there is interest.  Let me know in the comments below.  The pattern called for a small little felt embellishment, but I love to blend textures, so I made little crochet flowers to dress up the shoes.  I could add a tutorial for that too, so let me know in the comments if you would like that.

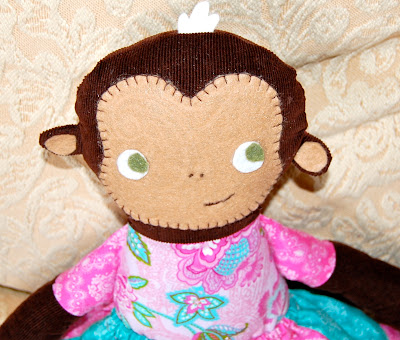
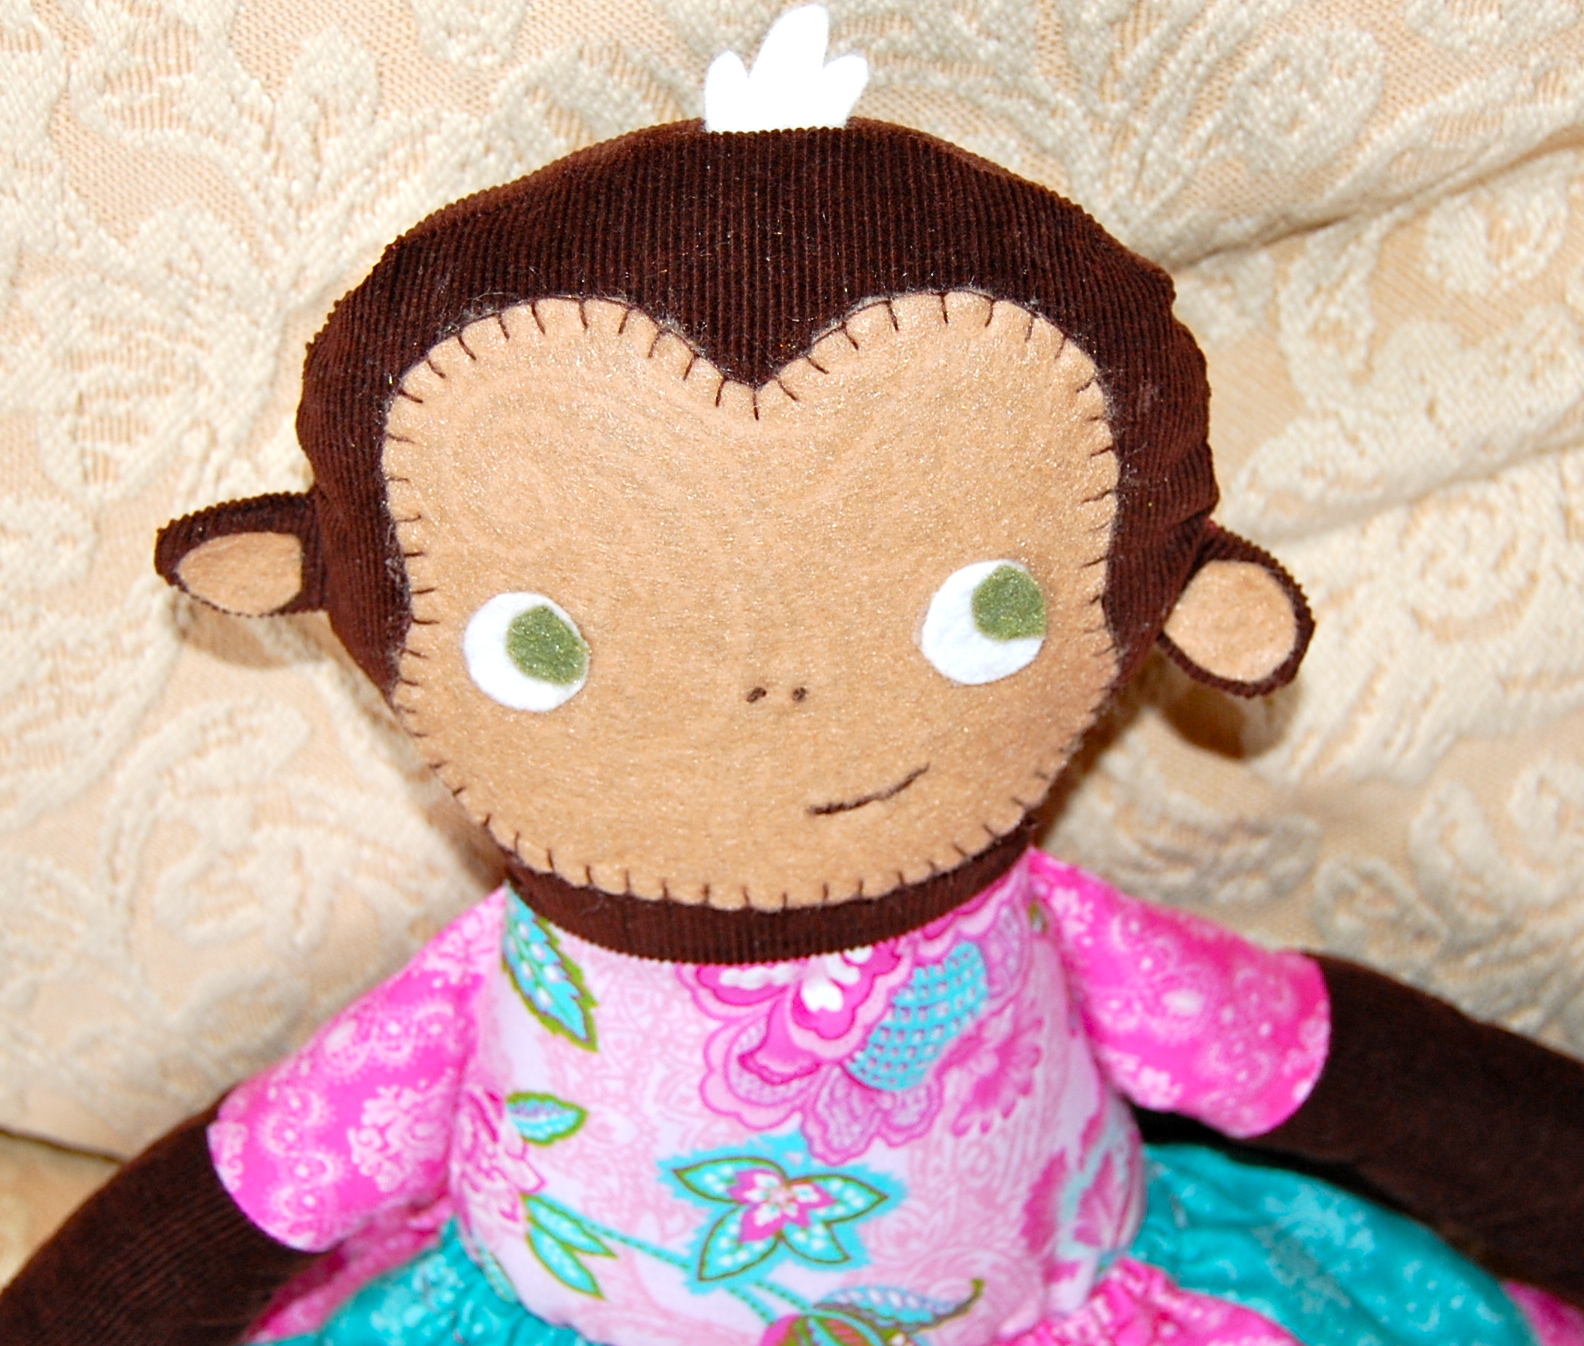
The closest thing I had to tan or brown in my felt pile was a textured piece of felt in a cappuccino tone.  I didn’t really like the texture, but trying to be economical and make it work, I decided to turn it over and use the wrong side. Fantabulous!! Just a subtle texture that added nice character!  The face piece is glued on and I used a blanket stitch around the edge.

  • I found nice instructions with photos for a blanket stitch here at the futuregirl craft blog

The eyes and ears are glued on and next time I would do a small machine stitch around the edge or if I felt ambitious, I may even digitize the face and machine embroider it on.  The nose is two french knots and the mouth is a running stitch.

  • Tutorial for a french knot here at stitch school
  • Tutorial for a running stitch here another page at  stitch school

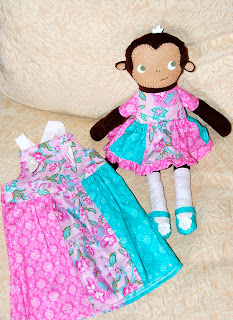
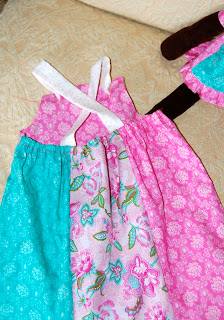
I had some extra fabric left so I made a matching knot dress too!

because that’s what I do with everything!  My niece is 1year old and the tutorial was for size 4/5 and 6/7 so I measured a dress in a 12mo size and then altered the pattern accordingly.  Really it was just the bodice piece I changed and then made all my other pieces based on the 12 mo size dress.  That’s clear as mud!!  Basically the length and width was estimated from the size of the 12 mo dress I had.

I think she’s cute!  What do you think?  I’d love to hear from you.

~Lia

This project is featured in the following link parties: funky polkadot giraffe, not just a housewife, tip junkie, running with glitter